
As a homeowner who loves tinkering in the backyard, you know the frustration of squinting at wood grain or fumbling in a dark tool drawer. Picture this: you’re trying to drive a screw, but the light’s fading, and the screwdriver slips. Or you’re digging through a drawer, feeling for that one small bit, only to knock over a pile of nails. These are the pain points of outdoor DIY, where poor lighting can slow you down or even lead to mistakes. A well-lit workspace isn’t just about seeing better—it’s about working smarter and safer. Solar-powered lights, designed for your outdoor workbench and tool storage, can solve these issues. They’re easy to set up, eco-friendly, and tailored to the needs of a DIYer like you. This guide walks you through choosing and using solar lights for your courtyard workbench, ensuring every screw, wood texture, and tool is crystal clear.
Why Solar Lights for Your DIY Workspace?
Solar lights are a game-changer for outdoor DIY. They harness the sun’s energy, so you don’t need to mess with wiring or outlets in your yard. After a day of charging, they deliver reliable light exactly where you need it—whether you’re sanding a board, aligning a drill, or grabbing a wrench from a drawer. Plus, they’re built tough to handle the dust, wood chips, and occasional tool bumps that come with the territory. The right courtyard outdoor workspace solar lights can illuminate fine details like wood grain or screw heads, make tool retrieval effortless, and even prevent trips over scattered gear. Here’s how to set up your workspace with three types of solar lights: adjustable spotlights for your workbench, mini drawer lights for tool storage, and foot-activated ground lights for safety.
Choosing the Right Solar Lights for Your DIY Needs
To make your outdoor workspace both efficient and safe, you need lights that match specific tasks. Below, we break down the ideal solar lighting solutions for your workbench, tool drawers, and surrounding area. Each recommendation focuses on practical features, like brightness, durability, and ease of use, to keep your DIY projects on track.
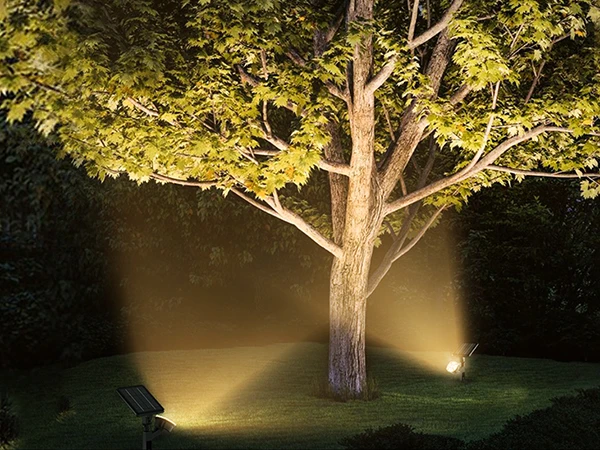
1. Adjustable Solar Spotlight for Workbench Precision
Your workbench is the heart of your DIY projects, where you’re cutting, drilling, or assembling. A solar-powered adjustable spotlight ensures you can see every detail, from the grain of the wood to the slots on a screw. Here’s what to look for:
- Brightness and Color: Aim for a 300-lumen cold white light (around 5000K). This crisp, bright light highlights fine details without washing out textures. Cold white is ideal for spotting imperfections in wood or ensuring precise cuts.
- Adjustability: Choose a spotlight with a tiltable head (at least 90 degrees vertical, 180 degrees horizontal). This lets you angle the light exactly where you need it—say, directly on a screw or across a board’s surface.
- Anti-Glare Design: Look for a spotlight with a frosted lens or anti-glare coating to reduce eye strain during long projects.
- Mounting: Magnetic or clamp-on mounts are perfect for temporary setups. You can stick the light to a metal workbench frame or clamp it to a shelf above.
- Durability: Pick a light with an IP65 rating for dust and water resistance. This ensures it can handle wood dust, sawdust, or a stray splash from a spilled water bottle.
- Bonus Feature: A USB port on the light’s body is a lifesaver. You can charge your cordless drill or phone without running back to the house.
Setup Tip: Mount the spotlight about 2–3 feet above your workbench, angled at 45 degrees to avoid shadows from your hands. If you’re working on intricate tasks like carving, tilt it closer to 60 degrees for direct illumination.
2. Solar Mini Drawer Lights for Easy Tool Access
Nothing slows you down like rummaging through a dark tool drawer. A solar-powered mini drawer light solves this by lighting up the moment you open the drawer, making it easy to grab the right screwdriver or hex key. Here’s what you need:
- Brightness and Color: A 50-lumen warm white light (around 3000K) is ideal. The softer glow reduces eye strain in confined spaces and makes it easy to distinguish between similar tools, like a Phillips and a flathead screwdriver.
- Motion Sensor: Choose a light with a built-in sensor that activates when you open the drawer and turns off after a 10-second delay. This saves power and ensures the light’s ready when you need it.
- Size and Installation: Look for compact lights (2–3 inches long) with adhesive backing or magnetic strips for easy installation inside drawers. No tools, no hassle—just stick and go.
- Durability: A sturdy casing (ABS plastic or aluminum) protects against tool knocks. An IP54 rating is sufficient for indoor drawer use, shielding against dust and minor splashes.
Setup Tip: Place one light at the back of each drawer, angled slightly toward the front. This ensures even lighting across all tools, from pliers to small bits. For deeper drawers, consider two lights, one on each side.
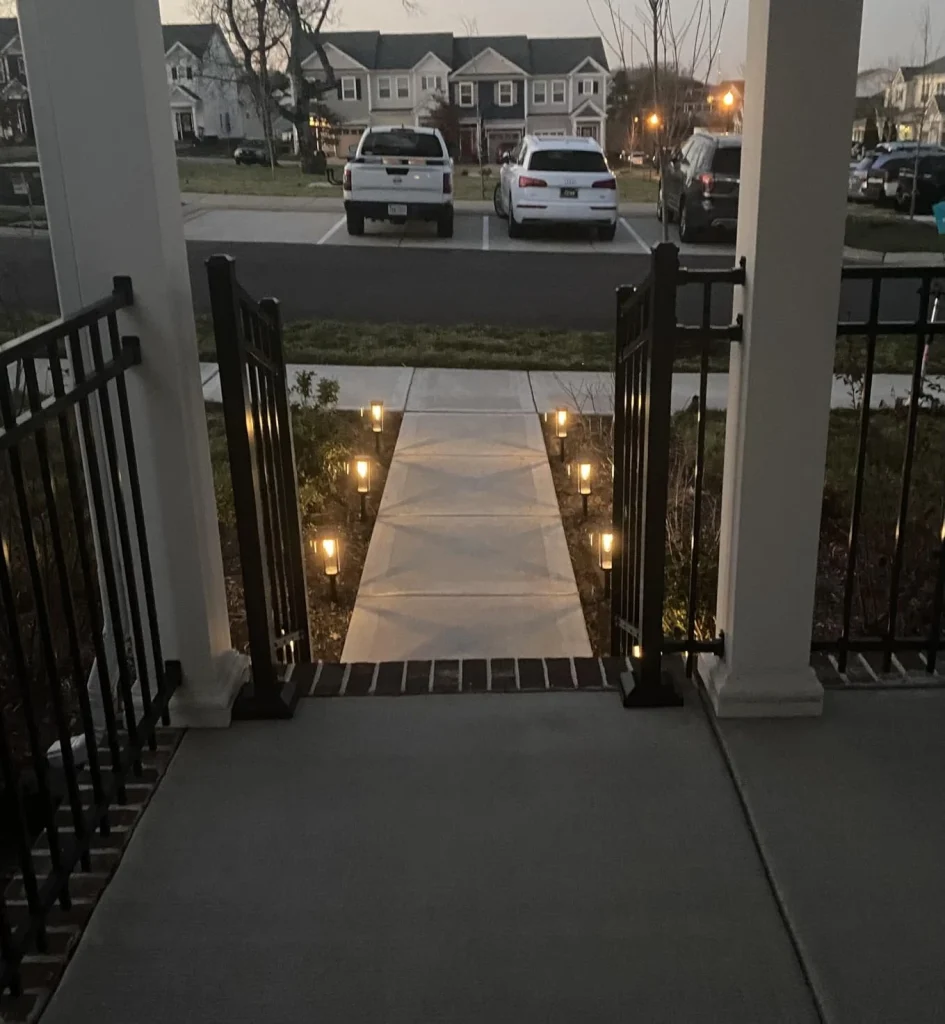
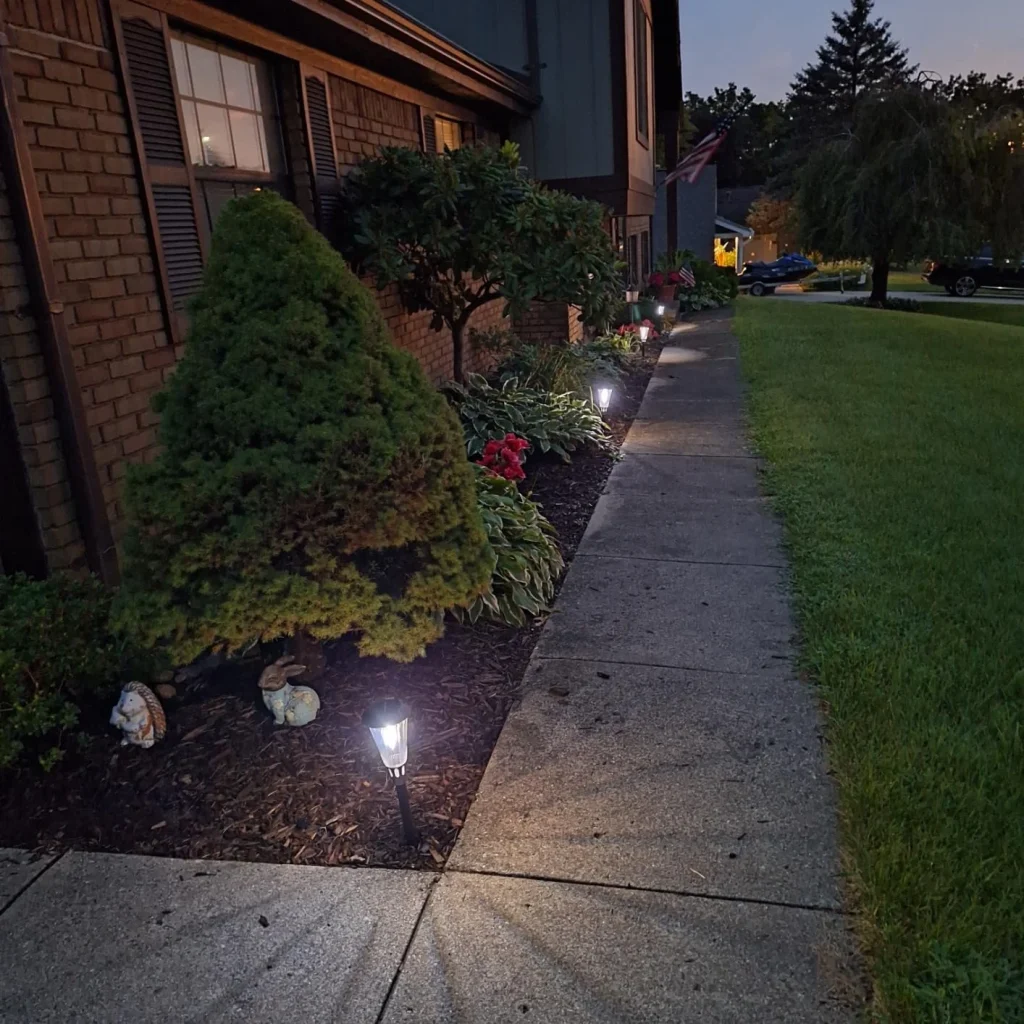
3. Solar Foot-Activated Ground Lights for Safety
Tripping over a stray hammer or stepping on a rolling screwdriver is a real risk in a busy outdoor workspace. Solar foot-activated ground lights keep your work area safe by lighting up when you step near. Here’s what to prioritize:
- Brightness: An 80-lumen soft white light (3500K) is bright enough to illuminate the ground without dazzling you. It highlights tools, cords, or wood scraps underfoot.
- Activation: Look for pressure-sensitive or motion-activated lights that turn on when you step within 2–3 feet. A 10-second auto-off feature conserves power.
- Durability: Choose lights with an IP67 rating to withstand dirt, dust, and occasional rain. A low-profile, impact-resistant design (like tempered glass or heavy-duty plastic) can handle being stepped on or bumped by tools.
- Installation: Stake-mounted or adhesive ground lights are easy to place around your workbench or along paths to your tool storage.
Setup Tip: Place lights every 3–4 feet around the base of your workbench or near tool storage areas. If your workspace is on grass or dirt, use stake-mounted lights; for concrete or wood decks, adhesive ones work best.
Key Features for Durability and Convenience
Outdoor DIY workspaces are tough on equipment, so your courtyard outdoor workspace solar lights need to stand up to the challenge. Here are must-have features to ensure longevity and ease of use:
- Impact Resistance: Lights should have rugged casings (like polycarbonate or aluminum) to survive accidental bumps from hammers or falling wrenches. Look for “shockproof” or “drop-resistant” labels.
- Dust and Wood Chip Protection: An IP65 or higher rating keeps wood dust and sawdust from clogging the light’s internals. This is especially important for spotlights above your workbench.
- USB Charging Port: A spotlight with a USB output (5V, 1A) doubles as a power bank for your cordless tools or phone, reducing downtime.
- Solar Panel Efficiency: Ensure the solar panel has a high-efficiency rating (at least 20%) to maximize charging even on cloudy days. A 5W panel is usually sufficient for small lights.
- Battery Life: On a full 8-hour charge in direct sunlight, expect:
- Spotlights: 5 hours of continuous use at 300 lumens.
- Drawer lights: 10 hours of intermittent use (based on 10-second activations).
- Ground lights: 8–10 hours of intermittent use.
Pro Tip: Position solar panels where they get direct sunlight for at least 6 hours daily. If your yard is shaded, consider a detachable panel you can place in a sunnier spot, connected by a 10-foot cable.
Setting Up Your Solar Lighting System
Installing your courtyard outdoor workspace solar lights is straightforward, even for a DIYer with basic skills. Follow these steps for a hassle-free setup:
- Plan Your Layout:
- Map out your workbench, tool storage, and work area. Identify where shadows fall during your typical DIY hours (late afternoon or evening).
- Place the spotlight to cover your workbench’s main work zone, avoiding glare in your eyes.
- Position drawer lights to illuminate all contents evenly.
- Space ground lights to mark high-traffic areas or spots where tools might roll.
- Install the Lights:
- Spotlight: Clamp or magnetically attach the light above your workbench. Adjust the angle to hit your work surface without casting hand shadows.
- Drawer Lights: Peel and stick the lights inside drawers. Test the motion sensor by opening and closing the drawer to ensure it activates reliably.
- Ground Lights: Stake or adhere lights around the workbench base. Walk around to confirm they light up when you step near.
- Position Solar Panels:
- Mount panels on a nearby fence, shed roof, or stake them in the ground. Ensure they face south (in North America) for maximum sunlight.
- Clean panels monthly to remove dust or leaves, ensuring optimal charging.
- Test and Adjust:
- Let the lights charge for a full day before using them. Test them at dusk to confirm brightness and sensor functionality.
- Tweak spotlight angles if you notice shadows or uneven lighting. For example, a 45-degree angle works for most tasks, but adjust to 30 degrees for detailed carving.
Maximizing Efficiency and Safety
With your solar lights installed, you’ll notice immediate improvements in your DIY workflow. The adjustable spotlight makes it easy to see wood grain, screw slots, or drill alignment, reducing errors like stripped screws or crooked cuts. Drawer lights eliminate the frustration of digging through dark storage, so you grab the right tool every time. Ground lights keep your workspace safe by highlighting stray tools or cords, preventing trips or falls. Together, these courtyard outdoor workspace solar lights boost your efficiency and keep safety first, letting you focus on the joy of building.
Maintenance Tips:
- Check solar panels weekly for dirt or debris.
- Inspect light casings for wood chip buildup, especially after heavy sanding sessions.
- Recharge backup batteries (if included) every 6 months to maintain performance.
Spotlight Angle Suggestions for Common DIY Tasks
To get the most out of your adjustable spotlight, tweak its angle based on your project:
- Woodworking (sanding, cutting): 45-degree angle, 2 feet above the workbench. This spreads light evenly across the wood, highlighting grain and imperfections.
- Assembly (screws, bolts): 30-degree angle, 1.5 feet above. Direct light minimizes shadows from your hands or tools.
- Detail Work (carving, engraving): 60-degree angle, 1 foot above. Focused light ensures precision for intricate tasks.
Why Solar Lights Are a DIYer’s Best Friend
Switching to solar-powered lighting transforms your outdoor DIY experience. No more squinting at faint details or fishing blindly for tools. With a bright spotlight, motion-activated drawer lights, and safety-focused ground lights, your courtyard outdoor workspace solar lights make every project smoother and safer. They’re easy to install, tough enough for the mess of woodworking, and powered by the sun—meaning no extra costs or wiring headaches. Whether you’re building a garden bench or sharpening your tools, these lights ensure you see every detail clearly, grab tools effortlessly, and stay safe. Get your workspace lit up, and let your next DIY project shine.
Leave a Reply